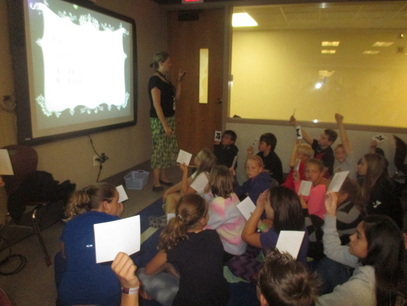
It is that time of year again! I love this idea that I first saw on Cari Young's blog last year. For the second year in a row, I've encourage students to transform a pumpkin into their favorite storybook character. I love seeing the creativity and the students love explaining why and how they created their character. I love the Storybook Pumpkin Patch! I send this letter home with participating classrooms. Then, I send this thank you note home with a little pumpkin bookmark to the students that participated. I love the pumpkin storybook patch. How do you organize the patch in your school or library? Leave your ideas in the comments below.
0 Comments
Last week, I had the opportunity to do a podcast with Mary Morgan Ryan on the Idea Box by @EdReachUs. It was great to meet and visit with another media specialist! We used Google Hangouts on Air to chat about video lessons and their role in my library. The podcast, plus many more great shows, can be found at http://linkis.com/ideabox.edreach.us/hBWrI. Or, you can watch the segment below: I was inspired by the flipped classroom movement to play around with video lessons. I have 3 ways I use them in my classroom. I've included some examples, but please not they are not perfect nor do I wish them to be :) Sub Plans! It is so easy to leave a little video for subs giving the directions right to the students. In the past, I have tried to leave directions for a sub, who then try to relay the messages to the students. A lot of confusion can happen when you play this game of telephone, especially with tech projects. The video lesson makes things easier for me, the sub, AND the students. Here is a sample sub video: Tutorials: Often, students are at different points in the same project. I've struggled with giving the simple "how to" directions for a project over and over again because the students don't remember the specific directions from a day or two ago. I've used video lessons to help remind students what they are supposed to do, and to let students work at their own pace. Plus, students can go back to listen to the directions if they forget or need help with a step, making them more independent. Here is a sample tutorial video: Library Checkout Lessons: In the past, I have been placed at very small schools. I was only in each library once or twice a week. I had a wonderful library assistant that would do the library checkout times with students, and when I was in the building I was doing mostly technology lessons and projects. I felt I missed out on some mini-lessons and valuable teaching opportunities by not being there for their checkout times. So, I create some video lessons that my assistant played during checkout times. Just little reminders or tips for students to think about right before they selected their books. Here is a sample lesson: I've used video creation tools like ScreencastOmatic, Windows Movie Maker, and Digital Storytelling tools like PhotoStory and VoiceThread.
How are you using video lessons in your library or classroom? Please share in the comments below! I've been reading and learning about makerspaces for a while now, and this week, I dove in! I started a "Maker Club" with 4th and 5th graders. This month, I choose to use some K'Nex kits I could check out from our district media center to get started. The kits helped students learn about gears, pulleys, levers, etc. I hope to use different materials and have different challenges each month. I was torn between having a directed or common challenge for students to complete, and just letting them have free reign to create anything they wanted. I understand the importance of "tinkering" with makerspace materials, but the educator in me, has a hard time letting go of the focus completely. I need to work on that! Additionally, I wanted to foster the development of some collaboration, creativity, critical thinking, and communication skills. Ultimately, I created a hybrid, I think it turned out pretty well. As the students came into the club afterschool, I randomly put them into groups of 3. Then, I described the 3 roles for the groups, and had them each take a role. Next week, they will be with the same groups, but choose a different roles.
Then, I gave each group of the K'Nex topics and spiral activity books (one group did pulleys, one group did levers, etc). Their job was to read the first "all about" page to learn the basics of their simple machine, and then select a project to complete. Lastly. the students shot a short video explaining what they did and what they learned. I was very happy with how the first club went. The students were excited and engaged, it was a focused activity, and they were able to summarize their learning as a final product. How do you structure your makerspace time in your classroom or library? Share in the comments below.
This summer, I learned about Plickers from Kelly Rexine at an EduTech training, and I couldn't wait to give it a try! Plickers are paper clickers, get it? :) Plickers = Paper + Clickers. They are a cheap and effective student response system. You just need the printed cards (free!) and the Plickers app on a teacher's device (also free!). The cards are numbered, so you can track students' responses. Students answer multiple choice questions by holding their card up with the appropriate response (A, B, C, D) on the top of their card. Like this: Then, the teacher scans the room with their device to record their responses and the app shows you the data in tables and graphs. So far, I've used this tool very informally. We've been discussing the district acceptable use policy and internet safety. I've used the Plickers to increase ENGAGEMENT and check student retention/understanding. Anything that isn't clear, I am able to clarify immediately. I'm excited to do more with this tool! For more information on Plickers, check out this You Tube video by Tabitha Carro from FlapJack Educational Resources. You can follow her blog at http://www.flapjackeducation.com/ How have you used Plickers in your classroom or library? Please share in the comments below!
I first saw this lesson idea on http://elementarylibraryroutines.wikispaces.com. I thought it was a great way to review book care procedures and some computer basics. First, we read: Then, we talked about how we could rewrite this book to "Animals Should Definitely Not Check Out Library Books." The students decided we should give the finished book to the new Kindergarten classes to help them learn about caring for books. We reviewed the basic book care rules. Next, we brainstormed how animals might break these rules. I printed these flashcards from ESL-Kids to get the ideas flowing. We just kept passing the cards around thinking of new reasons why that animal shouldn't have a library book. Lastly, the students created their pictures on ABCya Paint. I used this program so I could review how to save something to their computers. To publish the book: I collected all their images, converted them to a pdf, and uploaded our book to ISSUU. It is not perfect, but definitely, kid created :) Click here if the digital book does not appear below: I like how this lesson went because I was able to review book care rules, set my classroom procedures, practice students logging in with their own usernames, teach students how to use a touch pad mouse, and reviewed how to save a file. How do you teach book care? Share in the comments below. |
AuthorMisti Werle is the newly hired Library Media Systems Innovator in Bismarck, North Dakota. Archives
June 2015
Categories
All
|